
Goal
Goal: To create a modular APRS Digipeater/iGate that can operate with minimal maintenance and can take a variety of upgrades to better serve the user and community.
Time
Time: 2-4 Hours
Difficulty
Difficulty: Easy. All commands are laid out. No hardware modification is required.
Required Parts
| Item | Cost |
|---|---|
| Radio capable of 144.390 MHz | $70.00 |
| Audio Interface Cable | $25.00 |
| Raspberry Pi 4 2GB RAM kit | $90.00 |
| USB Sound Card | $8.00 |
| Audio Splitter Cable | $5.50 |
| System Total | $270.50 |
Required Infrastructure
- Home Internet Connection
- Area the project can be tucked away and left alone when assembled
Configuring Raspi
I’m going to assume that the Raspberry Pi has been setup with the most current version of raspiban. To start out, we will need to remote into the RasPi. I would recommend using a direct connection or VNC for the following tasks. SSH will work for the install, but in order to keep the device running 24/7 SSH will not work in the end.
Most of these commands will be copy and paste directly into terminal.
First, lets get all updates for the RasPi and apply them. If this is a fresh install of Raspiban this task can take some time.
sudo apt-get update && sudo apt-get upgrade -yWe then need to see if a package named pulseaudio is installed. We don’t want this package to be installed.
dpkg-query -l 'pulseaudio*'
Under “Version”, you want everything to say <none>. The location of where this information can be found is above in Figure 1. It does not matter how many items appear, they must all say <none> under “Version”.
If it is installed, then we must remove it. Run the following commands one line at a time. The last will reboot the device. If you are connected over VNC, it should auto reconnect when the pi powers back on.
sudo apt-get remove --purge pulseaudio
sudo apt-get autoremove
rm -rf /home/pi/.pulse
sudo reboot
Now that the Raspi has been prepared, it is time to start installing software. All supporting software can be installed in one line. Some of this software may be installed already, so this process may go by relatively quickly.
sudo apt-get install git gcc g++ make cmake libasound2-dev libudev-dev -yIt is now time to get the source code from Github. We will be pulling from the stable branch, then building the code on the raspi. Again, run each command here one line at a time. The last command will reboot the Raspi.
cd ~
git clone https://www.github.com/wb2osz/direwolf
cd direwolf
mkdir build && cd build
cmake ..
make -j4
sudo make install
make install-conf
sudo reboot
Configuring Direwolf
With everything installed, we need to configure Direwolf so it knows what hardware to use and how to behave.
Querying Audio Interface
Plug in the USB sound card to any port on the RasPi. Go to a new terminal window and run:
aplay -lThis will print out a list of audio out devices that the Raspi has access to. In Figure 2, it can be seen that Card 2, Device 0 contains the USB Audio sound card that was inserted earlier.

Now that we have the output path, lets get the input path. In the same terminal, run:
arecord -lThis will print out a list of audio in devices that the Raspi has access to. In Figure 3, it can be seen that again Card 2, Device 0 contains the USB sound card.

Take note of the card and device numbers. It is highly likely that by using the recommended hardware, it will be the same Card and Device for both input and output.
Modifying the direwolf.config File
All the settings for the direwolf.config file will setup how the APRS iGate/digipeater will behave. The file will be located on the RasPi at /home/pi/direwolf.config. Double click on the file to open it in text editor.
To make the instructions more direct, I will be identifying code changes by the line number. To enable them in the text editor, click View followed by Line Numbers.
When a change is done, it is important to delete the # symbol at the beginning of each line. This symbol is used as a comment and will be ignored by the Direwolf software. So even if the line is changed, it would not take effect if still commented out. You can insert your own lines in this file for notes just as long as a # precedes all text.
Line 86
Line 86 will appear similar to
#ADEVICE plughw:0,0You will need to update this to match your device. In this example with Card 2 Device 0, the line will change to
ADEVICE plughw:2,0Line 141
Line 141 will take some effort for changes. The line will appear such as:
MYCALL N0CALLN0CALL needs to be replaced with your call sign with the SSID of your APRS station. As for the SSID number, it is recommended to follow numbering convention and select -10 for this. Table 2 shows what the various SSIDs are used for.
| SSID Number | Station Description |
|---|---|
| 0 | Your primary station usually fixed and message capable |
| 1 | generic additional station, digi, mobile, wx, etc |
| 2 | generic additional station, digi, mobile, wx, etc |
| 3 | generic additional station, digi, mobile, wx, etc |
| 4 | generic additional station, digi, mobile, wx, etc |
| 5 | Other networks (Dstar, Iphones, Androids, Blackberry’s etc) |
| 6 | Special activity, Satellite ops, camping or 6 meters, etc |
| 7 | walkie talkies, HT’s or other human portable |
| 8 | boats, sailboats, RV’s or second main mobile |
| 9 | Primary Mobile (usually message capable) |
| 10 | internet, Igates, echolink, winlink, AVRS, APRN, etc |
| 11 | balloons, aircraft, spacecraft, etc |
| 12 | APRStt, DTMF, RFID, devices, one-way trackers |
| 13 | Weather stations |
| 14 | Truckers or generally full time drivers |
| 15 | generic additional station, digi, mobile, wx, etc |
For myself, this line would appear as:
MYCALL KI5GTB-10Note that I have had issues getting the SSID of -0 to work properly. This may of been caused by other issues on my Raspi, but I now use 10 as the SSID as it is more descriptive.
Beacon
Line 278
Now we need to enable the beacon feature. This will let the station transmit its location information to nearby users.
Line 278 will have this information. The changes that need to be done here are the latitude/longitude, power, height, gain, and comment.
For the latitude and longitude, i recommend this website (https://www.findlatitudeandlongitude.com/). As a example, I will be using the following information, using the address for the clubhouse. The latitude and longitude information is shown in Table 3 is how the information should be entered into the configuration file.
| Address | Latitude | Longitude |
|---|---|---|
| 28, East Main Street, Edmond, Oklahoma County, Oklahoma, 73034, USA | 35^39.31146 | 97^28.85964 |
The other settings should be self explanatory. Power of the radio, height of the antenna, gain of the antenna, and any comment you would like. This is the comment that will be broadcasted with the beacon and should be descriptive of the station.
PBEACON delay=1 every=30 overlay=S symbol="digi" lat=35^39.311460N long=097^28.85964W power=8 height=20 gain=4 comment="KI5GTB Home Station" via=WIDE1-1,WIDE2-1Digipeater
Line 318
This step is easy. Line 318 needs to be uncommitted. No changes need to be made. This will turn on digipeating functionality for this project. It can be thought of as a APRS repeater.
iGate
Line 348
To link the project to the internet, we need to enable the services for a connection.
On line 348, you will need to modify the line to where it looks like this:
IGSERVER noam.aprs2.netThe next line requires getting a pass code to log into the servers. The pass code can be retrieved for free and instantly at http://apps.magicbug.co.uk/passcode/.
Table 4 has examples on what you should retrieve. Use your own call sign for this. The information for Table 4 is for reference and can be used as a sanity check to ensure that the generator is working properly
| Station | Passcode |
|---|---|
| KI5GTB-10 | 22958 |
| k5eok-10 | 13976 |
Line 353
On line 353, you will need to enter in your callsign-SSID and pass code. Mine has been included as a example
IGLOGIN KI5GTB-10 22958The last change will be to uncomment line 370. No changes will need to be made.
Line 363
On line 363, uncomment and modify the lat/long information. Use the same information and the same format used in line 278 above.
To recap quickly, the following lines should of been modified in some way. Make sure to save this file.
- Line 86
- Line 141
- Line 278
- Line 318
- Line 348
- Line 353
- Line 363
- Line 370
Hardware Configuration
To assemble the unit, the following connections need to be made:
- Raspi -> USB Sound Card
- USB Sound Card -> Headphone Splitter
- Headphone Splitter -> APRS Cable
- APRS Cable -> Radio
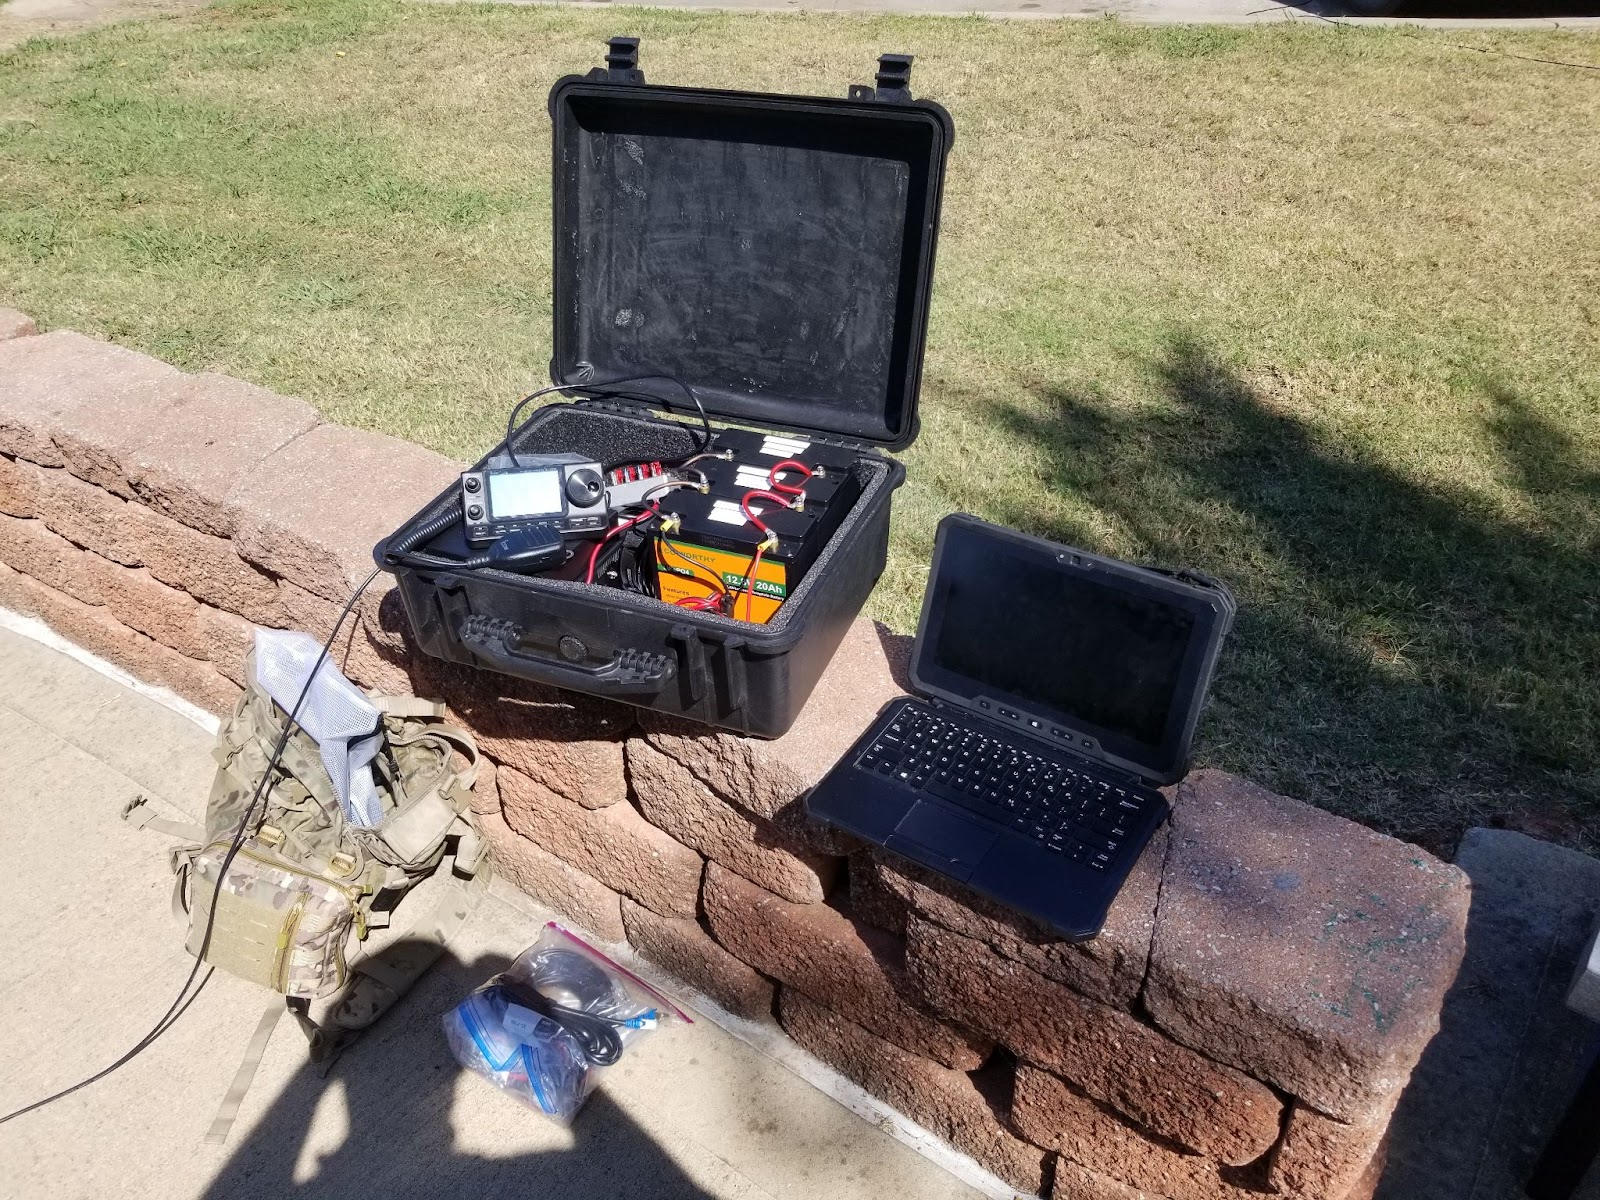
Figure 4 shows how my setup is currently connected together. This is using the recommended hardware in Table 1, but the concept can be applied to multiple different radios. The cable can also be DIYed if you so choose using this (https://github.com/johnboiles/BaofengUV5R-TRRS) board created by KK6GIP (Note that I have not tested this board personally).

For the radio, I am using a Baofeng BF-F8HP for my transceiver. The following settings in Table 5 will need to be changed and the frequency tuned to 144.390 MHz
| Setting | Setting Number | Setting Value |
|---|---|---|
| SQL (Squelch) | 0 | 1 (Lower the value is better) |
| TXP (Transmit Power) | 2 | HIGH |
| VOX | 4 | 1 (Lower is better) |
| R-DCS | 10 | OFF |
| R-CTCS | 11 | OFF |
| T-DCS | 12 | OFF |
| T-CTCS | 13 | OFF |
| VOICE | 14 | OFF |
| OFFSET | 26 | 000.000 |
| RODGER | 39 | OFF |
While this is written for a specific radio, note the trend in the settings. We want it to transmit as high as possible, we want squelch and VOX to be low, we want to tones to be setup, and nothing that may interrupt a transmission.
Starting Direwolf and Verifying Operation
Connect to the Raspi or VNC into it. I do not recommend the use of SSH for this task.
Go to a terminal and run the following command
direwolfAfter booting up, the terminal will look something seen in Figure 5. Note that I have received a transmission from myself on my Yaesu FT3D HT.

You should now be able to go to https://www.aprs.fi and search for your call sign.
At this point, the APRS beacon is live and working. For fun, I can inspect the server at http://198.50.198.139:14501. I see my station (KI5GTB-10) with the following stats.

Starting Direwolf at Boot
Now that the device has been setup properly, lets make it to where it will recover its self at power loss/reboot. This will require the use of using Cron in linux and is optional, but will help with maintaining the server.
Start with opening up a new terminal window. Type in the following to edit the crontab.
crontab -eYou will need to select a default editor. I recommend Nano (which is offered by default). It is the easiest for someone new to this kind of work.
This will open a new file with lots of commented out lines. Use the arrow keys to go to the bottom of the file and get to a new line on bottom. For the direwolf instance, it is recommended that the software be started at boot. Enter the following in to the bottom of the file.
@reboot /home/direwolf >/devv/null 2>&1To break down this command further,
- “@reboot” tells linux to run this line when the system powers on.
- “/home/direwolf” is where the direwolf file is located at. You may need to modify this command for your specific install.
- “>/dev/null 2>&1” handles the terminal output of direwolf. When you run the direwolf command yourself, there is lots of output in the terminal. This command takes that output and junks it. It helps keep the process running smoothly.
Once this is done, Use Ctrl+X to close out the nano window. You can now reboot the pi to see if the process worked. This can be done by running the top command. With top, it tells you the processes that are currently running. You will be looking for a process called direwolf.
Sources/Useful Links
http://www.aprs.org/aprs11/SSIDs.txt
https://github.com/johnboiles/BaofengUV5R-TRRS
https://n1aae.com/raspberry-pi-aprs-direwolf-linux-igate-digipeater/ (This is the instruction set I followed when creating mine for the first time)


7 thoughts on “APRS Digipeater/iGate with Direwolf (Entry Level)”
I’ve built three of these Digipeaters and my third one I had trouble with. Could be the newer version, or it could be me. I’m not sure yet.
what would you put in the pbeacon so that it comes up as a black diamond with an I for an igate on the map?
The Direwolf user guide (V 1.6, October 2020, on page 117) talks about the symbols and how to change them. I think for your Black Diamond with a “I”, try:
SYMBOL=\& OVERLAY=I
or
SYMBOL=I&
I haven’t tested this, but according to the documentation, either one of these should work. The first option would be considered the more ‘traditional’ setup, while the second is using the alternate scheme. The alternate scheme is acknowledged in the new symbols document which is linked in the same user guide further down on page 119. Keep in mind APRS doesn’t transmit the image that should appear, rather the 2 character code and it is up to the receiver to be able to properly decipher it. So depending on what APRS map software you are using the symbols may be correct, they may not. It looks like APRSDirect does use the newer symbol images (https://www.aprsdirect.com/). Hope this helps!
Direwolf User Guide Referenced: https://github.com/wb2osz/direwolf/blob/master/doc/User-Guide.pdf
Be warned, this user guide reference may bring you to a newer version than mentioned in this comment. Page numbers may be off in the future, but the content *might* be unchanged.
–KI5GTB
I tried direwolf a few years back – was complicated to build, configure and scared me 😀
Your how to is well written and makes it look more straightforward – when I acquire some of the cables I’ll be giving it a try – thanks!
Direwolf can certainly seem daunting. I recently built my own fill-in digipeater and igate using Direwolf. It definitely takes some tinkering but once it is configured it works really well.
Just got my Digipeater up and running thanks for all of the info. The only thing is my lat and log are off just a little I tried to use the website you suggested but when I put in my address it thought I was in Mexico so I just used my iPhone to get my gps but it must be off just a little because when I look on the map it shows about 1/4 mile from my home qth but other than that I am very pleased with the results now we have another igate and digipeater to fill in the gap. Thanks again. 73
KO4TFB
Hello, thank you for the article. In direwolf.conf, under the DIGIPEATER settings, how do I set it to only transmit my own call sign? I guess this is a “Fill-N” digipeater? Is this correct?
DIGIPEAT 0 0 ^WIDE1-1$ ^WIDE1-1$
You mention not to use SSH. I would suggest that one can use SSH and tmux/screen. Fantastic for this type of installation. Thanks for the write-up!